Adding a user
Adding one or more users, into the account, one might add a user when someone joins in the team. The process of creating a user and enabling that user to perform work tasks consists of the following steps:
Navigate Settings and select User Management.
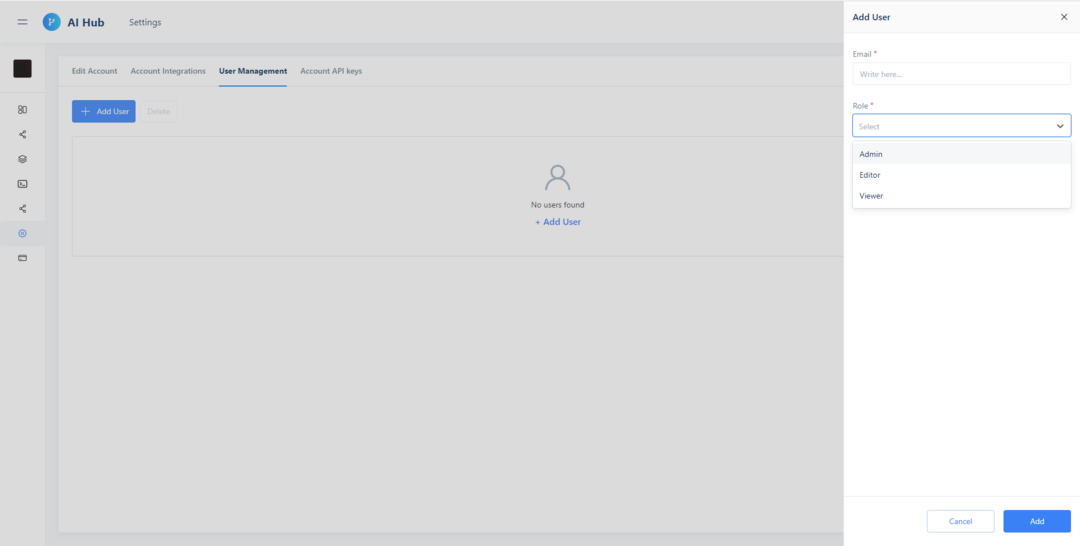
Click on Add User
Enter the email address of the user that you want to invite on the Email field.
From the dropdown choose the role for the user.
Admin - Has admin roles on the account, can create and train models.
Editor - Has editor role on the account, it can edit all the components, but it can not train and deploy models.
Viewer - Has just view access on the account.

Add a user
Delete a user
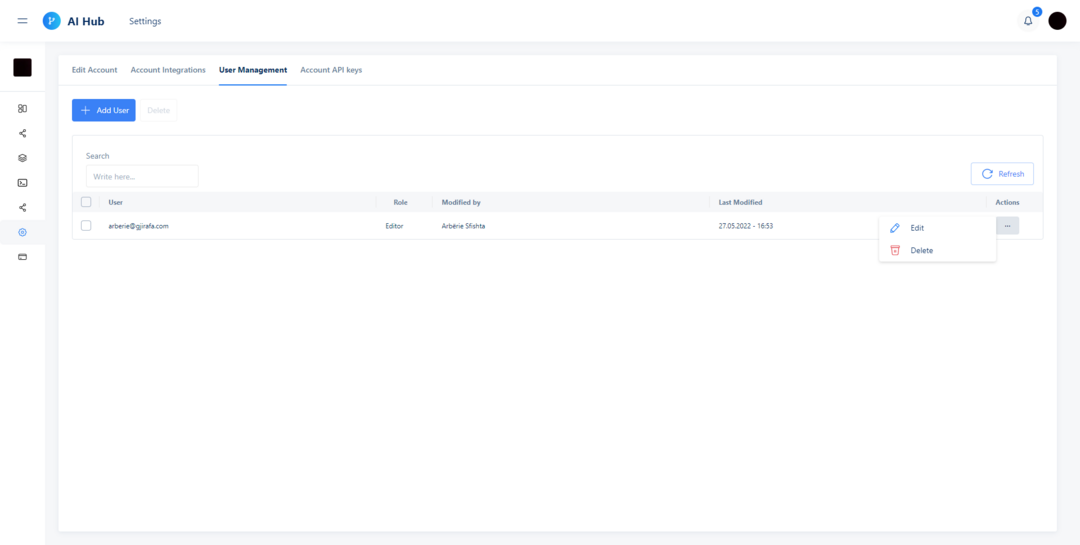
On the Action column from the User Management tab, one can easily delete a user.
Click on the ellipsis icon next to the user and click on the delete.
Click on Delete on a confirmation dialog box.

Delete user
Modify the user role
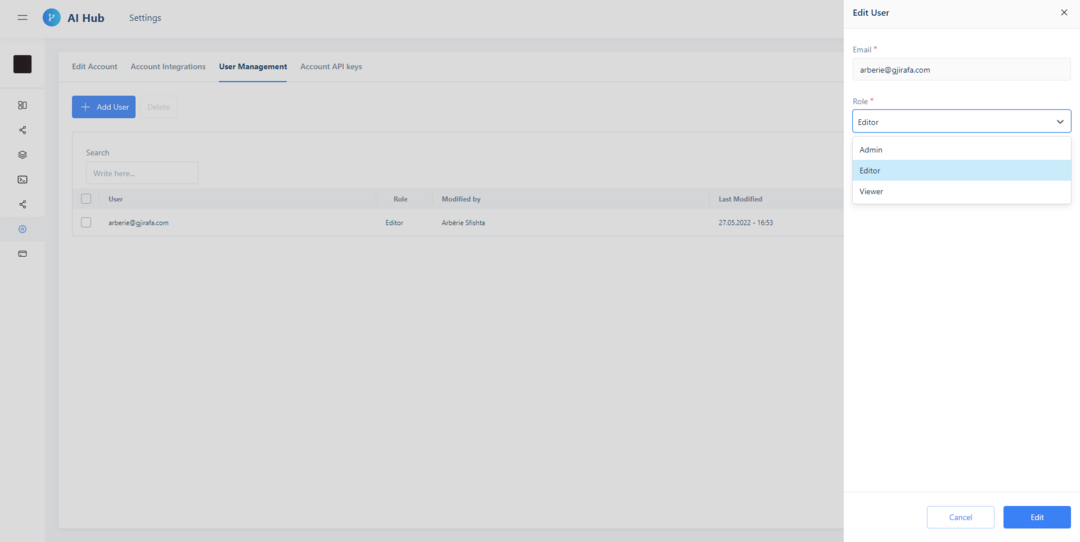
On the Action column from the User Management tab, click on the ellipsis icon next to the user and click on Edit.
From the sidebar menu change the role of the user
Admin
Editor
Viewer
To confirm the change select the Edit button

Edit user role

